Using AdGuard For Efficient DNS Lookups
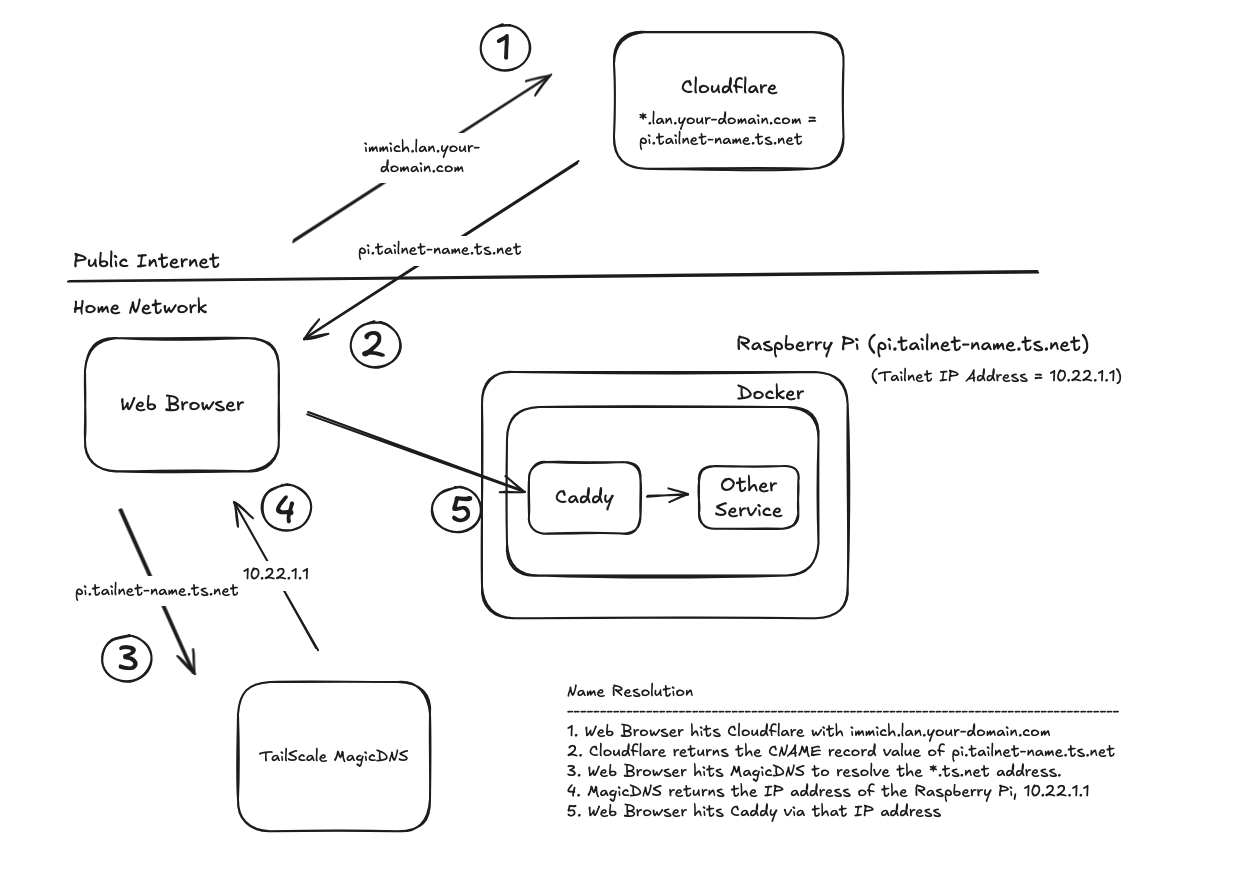
If you went through the previous post and got Caddy working to obtain TLS/SSL certificates on your home network you may have noticed that the process introduced some inefficiencies in the DNS lookup process. Namely, we’re now going out to a public internet DNS provider, like Cloudflare, as part of the DNS lookup process for a machine on our internal network.
The extra time is a few dozen milliseconds, but if you want to optimize speed, you can add either AdGuard or Pi-Hole to the mix. Both products act as a middleman between your devices and the DNS providers on the public internet. Their primary purpose is to block ads by not forwarding the DNS request if the domain name of the requested address matches a know ad or malware site. However, both products also allow for DNS rewrites (DNS Records if you’re using Pi-hole), which are static mappings of domain names to IP addresses. Basically, it can resolve specific domain names to IP addresses without hitting an upstream Internet DNS service. By utilizing that feature, we’ll end up with this.
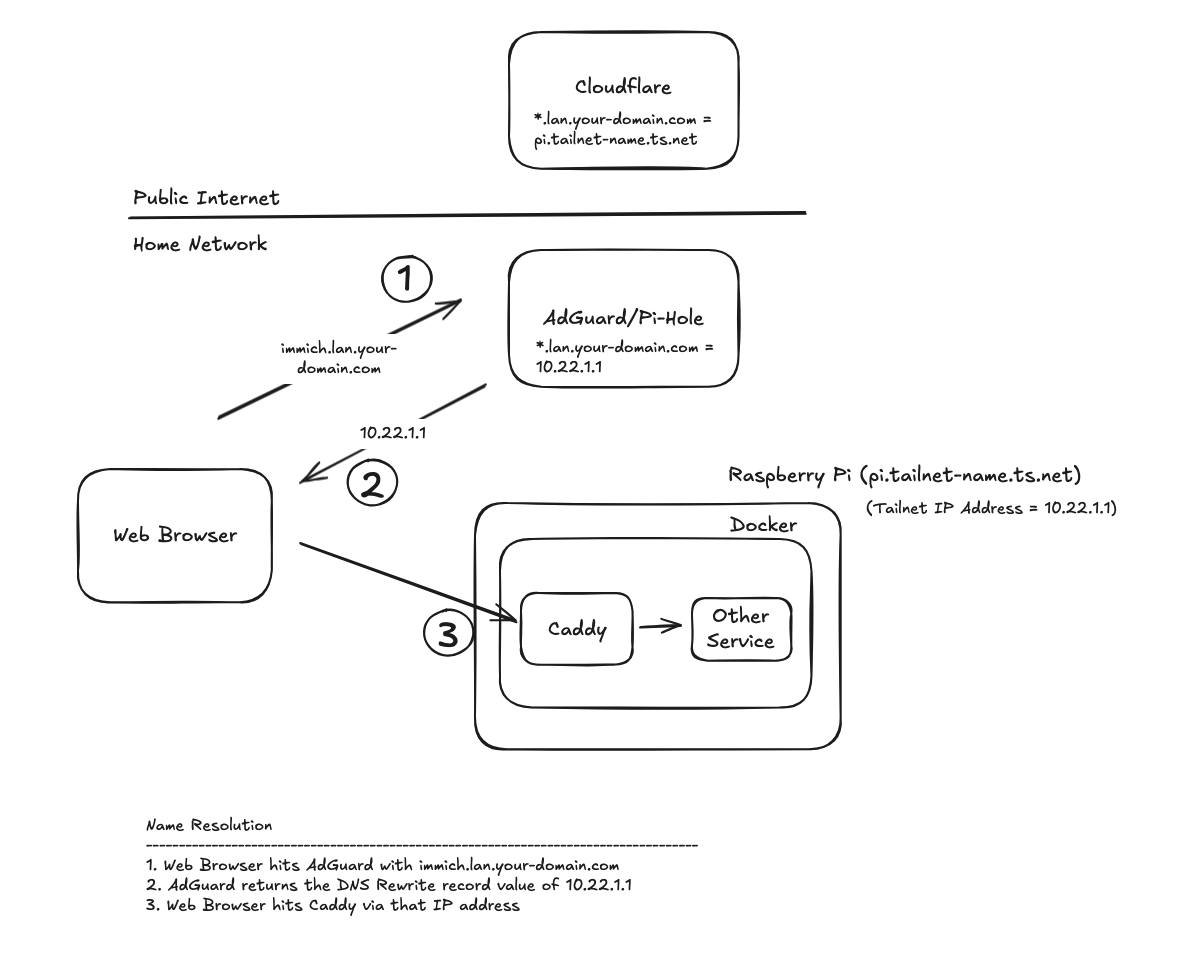
Since we know anything ending in “lan.your-domain.com” is handled by Caddy, we can safely direct all traffic with those destination domains to our Caddy server.
AdGuard vs Pi-Hole#
Which one is better? Depends on who you ask. Both are free and open source, with AdGuard being backed by a commercial company and Pi-Hole being solely maintained by the open source community. Their core functionality is exactly the same, so for the most part you can use either one. I use AdGuard mainly because that was the first YouTube video I watched on network wide ad blockers.
Installing AdGuard#
I won’t go too much into the installation process. The official docs do a good job with that. Since they don’t explicitly discuss how to run this with a Docker Compose file, I will show a basic example here to get you started if you need it.
services:
  adguardhome:
    image: adguard/adguardhome
    container_name: adguardhome
    restart: unless-stopped
    volumes:
      - ./work:/opt/adguardhome/work
      - ./conf:/opt/adguardhome/conf
    ports:
      - "53:53/tcp"
      - "53:53/udp"
      - "8080:80"
Configure Tailscale#
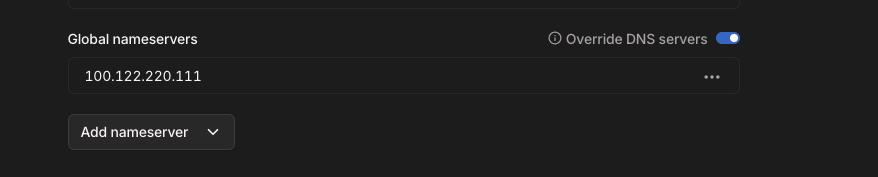
After you get the container running, you’ll want to set it as the DNS server for your Tailnet.
- Log into your Tailscale admin console.
- Click the DNS tab at the top.
- Click on the “Add nameserver” button in Nameservers section.
- Enter the Tailnet IP address of the server running AdGuard. Make sure this is the Tailnet IP address and not the server’s “regular” IP address (the one supplied by your router). If you enter that one DNS might break if you’re connected to your Tailnet but not also on your home network.
- Turn on the “Override DNS servers” toggle.
Adding the DNS Rewrite Entry#
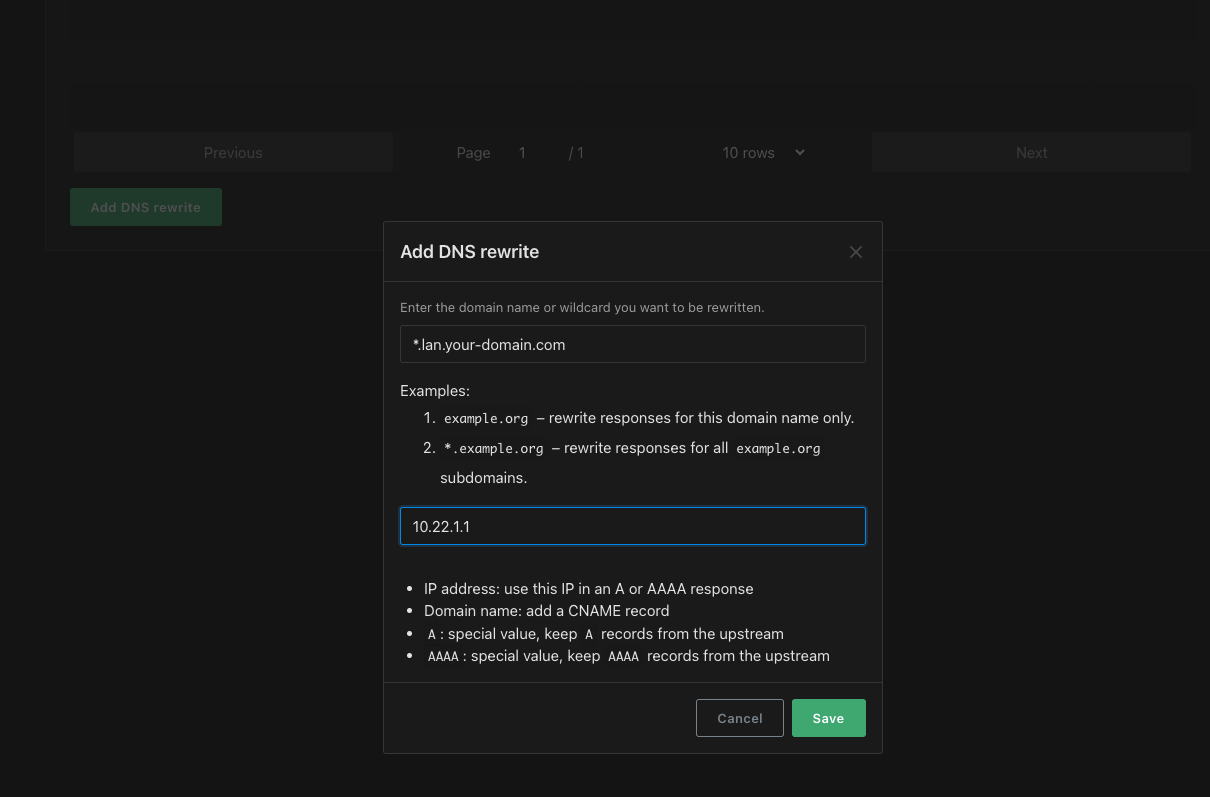
Access the AdGuard admin page by entering http://<server ip address>:8080 . Note this is http, not https. You could of course set this up like your other services to run through Caddy as a reverse proxy and allow it to get an SSL certificate for you.
- Click the Filters menu and choose “DNS rewrites”.
- Click the Add DNS rewrite button.
- Enter the same value you entered in the CNAME record in Cloudflare. Something like: *.lan.your-domain.com
- Enter the Tailnet IP address of your Caddy server
- Click Save
That’s it. Now anytime a machine on your Tailnet network does a DNS lookup with a domain name ending in “lan.your-domain.com” AdGuard will return the Caddy server IP address without any additional steps.